
Painting and editing / USER GUIDE
Layers, masks, and blending
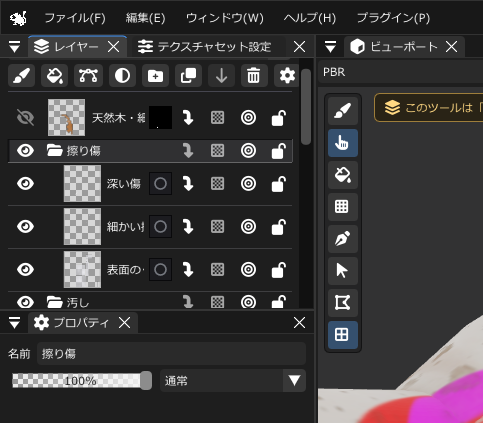
Content previews hidden
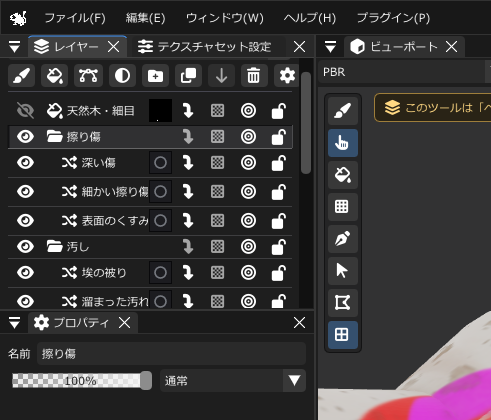
Content previews shown
Layer types
| Type | Main use |
|---|---|
| Paint | Paint specific areas with brushes, erasers, and stamps |
| Material (Fill) | Cover a surface with constant channel values, images, or procedural patterns |
| Path | Create paths whose anchors, strokes, and fills can be edited later |
| Adjustment | Adjust the composited result below with Color Adjustment, Gradient Map, or Tone Curve |
| Group | Organize layers into folders |
Select and configure layers with the pie menu
In Ver.0.1.2, the pie menu lets you choose layers by thumbnail in both the 3D viewport and UV Editor.
- Hold the right mouse button and slide into Layers in the pie menu.
- Move onto the desired layer card in the thumbnail list.
- Release the right button over the card to select that layer. Press Esc to cancel.
With a pen tablet, place the pointer at the top or bottom of the list to scroll through layers. Return to the center to stop. You can also select a card by tapping it with the pen tip.
The controls beside a card toggle Visibility, Lock, Clipping, Alpha lock, Stroke height, and Solo. While holding the right button, slide onto a setting and release there to change only that setting. Passing over other settings does not change them. Enabled settings have a blue background, and a brief animation stretches and connects the buttons to show the interaction.
Available settings depend on the layer type. Alpha lock and Stroke height are Paint-layer controls. Clipping is unavailable on groups or without an eligible layer below. Hidden layers and layers inside hidden folders remain hidden in Solo.
Tool changes when selecting a layer
In Ver.0.1.2, selecting a Path layer switches to the Path tool. Selecting a Paint layer switches to the brush, while retaining Color blending / Blur, UV Shell Fill, or Polygon Fill if you are already using that mode.
Editable adjustment layers
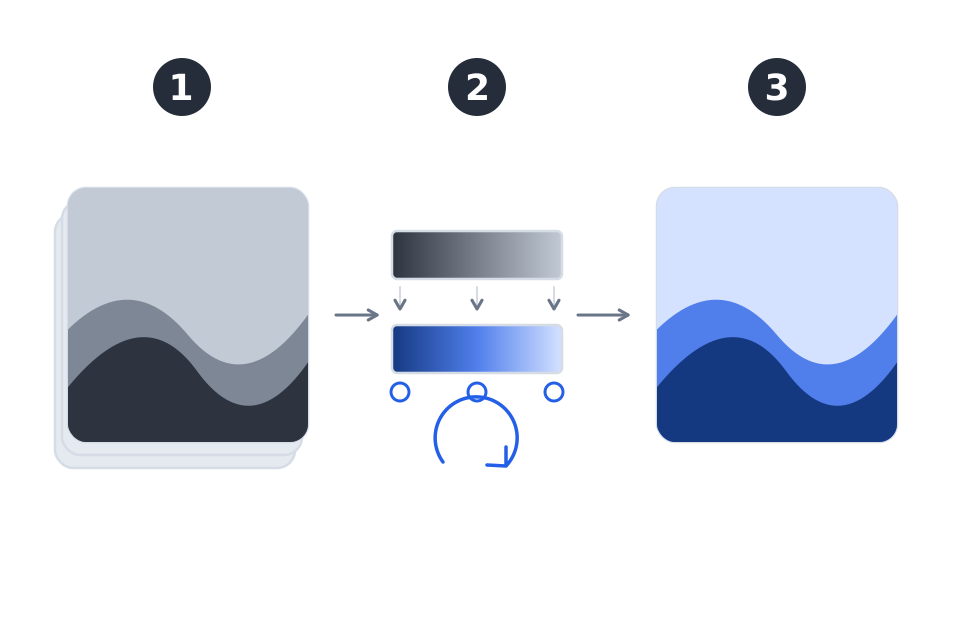
Use New adjustment layer in the Layers panel to add Color Adjustment, Gradient Map, or Tone Curve. These affect the composited result of the layers below. Change target channels and adjustment values later in Properties. They remain editable after saving and support Undo/Redo.
When launched from the Plugins menu, preview the result in the viewport. Apply creates an adjustment layer; Cancel restores the previous appearance.
For steps, parameter ranges, and how to choose among the three effects, see Built-in adjustments.
Add and organize layers
Use the controls at the top of the Layers panel to add, duplicate, delete, or group layers. When the Layers panel has focus, you can also press Delete to remove the selected layer (deleting a group also deletes its child layers). Drag layers to reorder them, and double-click groups to expand or collapse them. Change names, opacity, and blending modes in Properties. Normal uses standard compositing, Multiply darkens the underlying result, Add adds brightness, and Overlay adds contrast while retaining the underlying appearance.
Select a layer and press F2 to rename it. Drop a layer onto the middle of a folder row to move it inside, or onto the top/bottom edge to reorder it at the same level. The layer display settings gear toggles content previews and lets you choose Entire texture or Focus on painted area. Preview framing does not change the artwork.
Copy, cut, paste, and duplicate
With the Layers panel focused, the default shortcuts are Ctrl+C to copy, Ctrl+X to cut, Ctrl+V to paste, and Ctrl+D to duplicate. Groups include their child layers. A copy keeps a snapshot of the content at that moment. Paste, cut, and duplicate support Undo/Redo.
This is a layer clipboard for the same scene. A new scene clears it. These actions are unavailable during text entry, dialogs, imports, or stroke processing. Cutting or deleting all remaining layers is not allowed.
Where new and pasted layers go
New layers are inserted immediately above the selected layer in the target texture set. Select a layer inside a folder to insert into that folder. Selecting the folder itself inserts a sibling above it, outside the folder.
Pasting follows the same placement rule but retains the source texture set. If a different set is selected, the paste goes to the top of the source set and the view switches to that set.
Solo includes a group’s child layers. Soloing an adjustment also keeps its underlying input, while soloing an ordinary layer retains adjustments above it. Click Solo again or use Exit solo to return to the complete stack.
Hidden layers and layers inside hidden folders remain hidden in Solo.
Lock a layer to prevent painting.
When Merge Down is available
Merge Down is limited to adjacent Paint layers in the same texture set and hierarchy level. Both must be visible, at 100% opacity, use Normal blending, have no enabled mask or mask strokes, and have no clipping. Their current Lock Transparent Pixels settings must match, and neither may contain strokes recorded with alpha lock. A clipping layer directly above them also prevents merging. An eraser stroke on the upper layer or mismatched height settings also prevents merging.
Response when changing opacity
Ver.0.1.1 optimizes recompositing to reduce the wait for results after changing a layer's opacity. Use the usual opacity control; no separate tool is needed.
Gains vary by operation and environment. See the Ver.0.1.1 update notes for the workload, development environment, and measured results.
Control visibility with masks
Masks are available on Paint, Material (Fill), and Adjustment layers. Path and Group layers have no mask slot. Lock Transparent Pixels is available only on Paint layers and confines new strokes to the area already painted at that point.
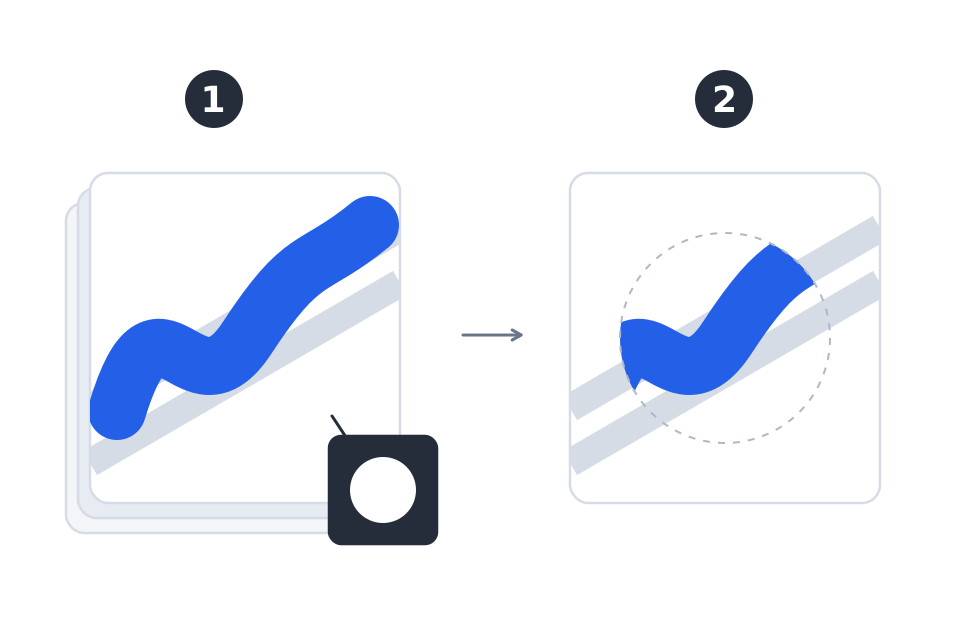
Click a layer's mask area to add or select a mask.
A new mask starts black, so the whole layer is hidden at first. The original content is still there. Paint on the mask to reveal it.
Paint on the mask to reveal more of the layer, or use the eraser to hide more of it.
Switch back to the content to edit the original layer.
Shift-click a mask to enable or disable it. Use the layer mask view to inspect its coverage. Clipping restricts a layer to the painted area of the layer below. Lock Transparent Pixels restricts new strokes to the existing painted area of the same paint layer.
Clipping is unavailable on a group or when there is no eligible layer below. An empty Paint layer has no existing coverage for alpha lock, so leave alpha lock off for the first strokes.
Stroke Height controls the height effect of painting. Use Raise/Lower and Height Amount to set the direction and amount of relief.