
Painting and editing / USER GUIDE
Drawing and editing paths
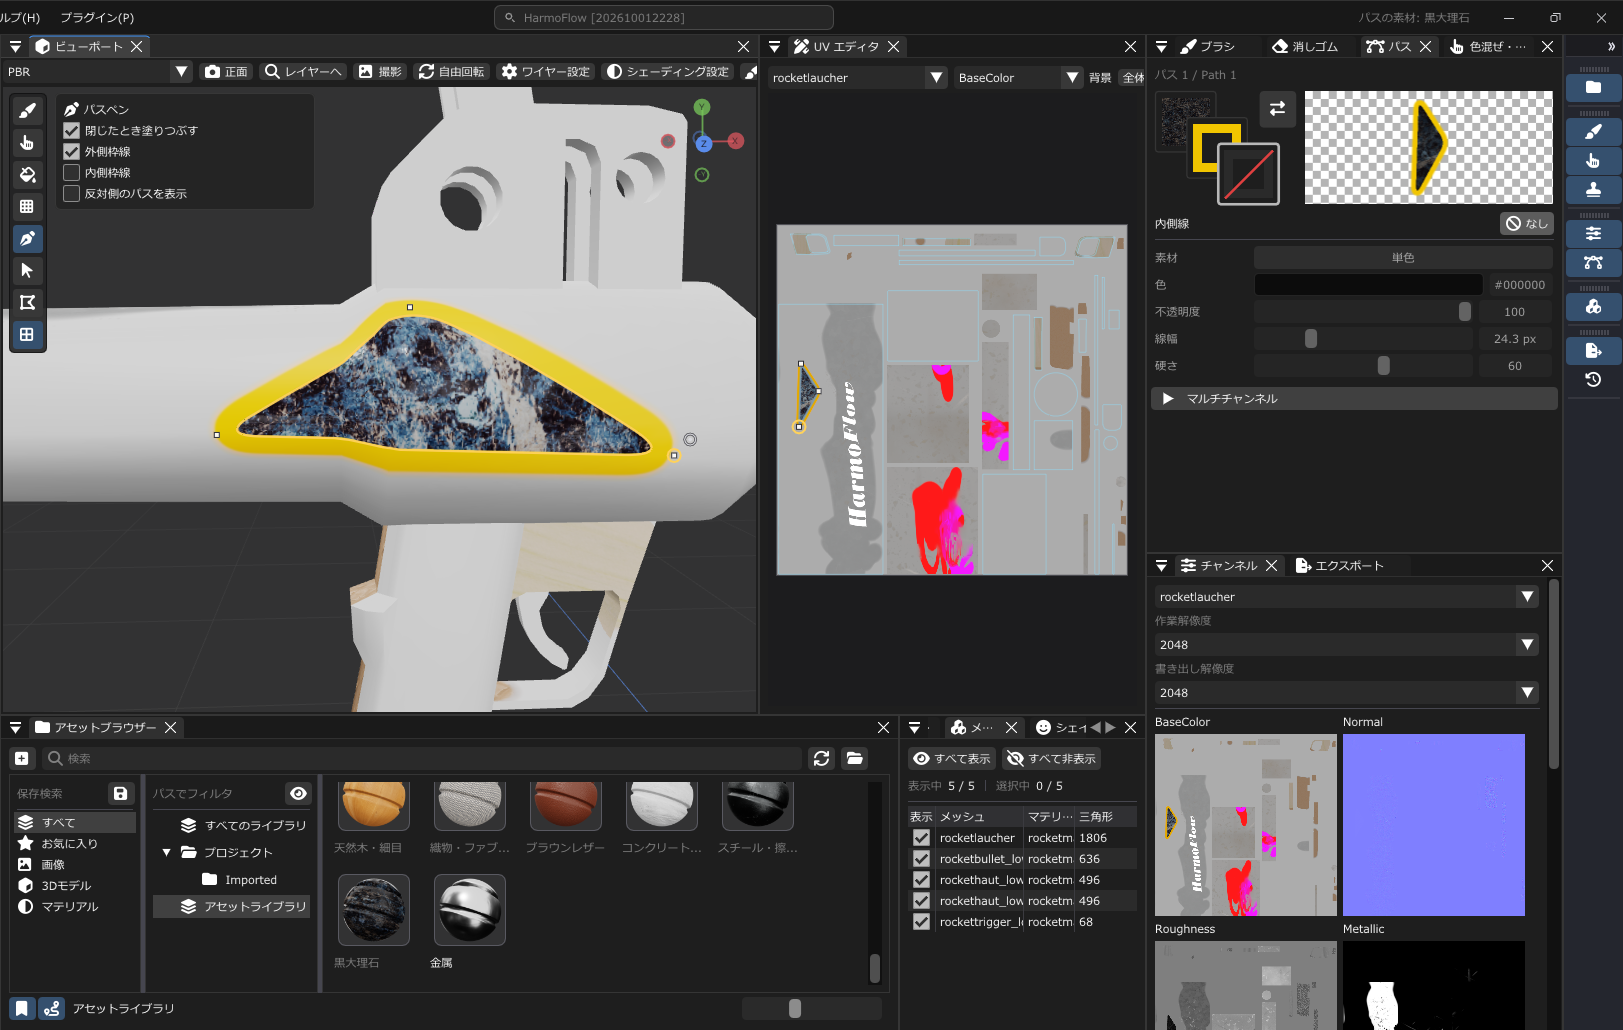
Create a path
Press P to switch to the Path tool. Click the model to place a corner anchor, or drag while holding the button to create handles for a curve. While drawing a new path, click its last anchor to retract the outgoing handle.
Press Enter to finish an open path, C to close it, F to close and fill it, or Esc to cancel. While drawing, Delete / Backspace removes the last anchor. You can also click the starting point to close the path.
C and F are the initial bindings. If Close Path is unassigned, choose a non-conflicting key in Key Config. See the shortcut reference.
When closing a path by clicking its first anchor, “Fill when closed” in Properties controls whether it is filled. Turn on “Show paths on far side” to inspect paths on the other side of the model.
Create each path within one texture set. Open paths need at least two anchors; closed paths need at least three. Use C/F while drawing with the pointer over the 3D viewport.
Click a completed path in the 3D view to edit it again. Drag anchors or handles to refine the contour, click a curve to add a point, and press Delete to remove the selected point. Double-click an anchor to switch between corner and smooth. Click outside the path, or press Enter or Esc, to finish editing.
You can also edit in the UV Editor while checking the positions of UV islands. See UV Editor for its controls.
Multiple anchors and rounded corners
While editing a completed path in the 3D view, drag from empty space to box-select several anchors. Drag a selected anchor to move them together, or press Delete to remove them. Drag the small circle beside a selected corner anchor to adjust its rounding.
New 3D paths and UV-island boundaries
Ver.0.1.2 fixes strokes and fills on paths newly created in the 3D view breaking or jumping to another position at UV-island boundaries. Each path still needs to stay within one texture set.
To use this improvement for older paths saved with UV coordinates, recreate those paths in the 3D view. Opening an existing path alone does not turn it into a new 3D path.
Keep the original file if you also use an older version
Scenes containing the new 3D paths cannot be opened in Ver.0.1.1 or earlier. Check scene version compatibility before recreating paths.
Fills and two outlines
Set the fill, outer outline, and inner outline independently in the Paths panel. Fills have rounded/sharp corner options and opacity. Outlines have width, hardness, and opacity. Each can use its own painting channels. Swap the color swatches or choose None to create an outline-only or fill-only result. Use Rebake Paths to update the baked result.
Materials for fills and outlines
A path's fill, outer outline, and inner outline can each use a different material. Select the corresponding swatch, then choose a material with the Material button or drag it from the Asset Browser. Clicking a material in the browser also assigns it to the selected fill or outline. Choose Solid Color to return to the original color.
Material maps and compositing are retained. Adjust width and opacity per path. These settings support scene saving and Undo/Redo.
Style targets and deleting anchors
Open an existing path before changing its appearance. When no path is open, the panel sets defaults for the next path. Swapping swatches exchanges RGB only, leaving widths and opacity unchanged. Right-click empty space in the Paths panel for Rebake Paths. Deleting anchors removes the whole path if fewer than two remain on an open path or three on a closed path.