
Display and surface properties / USER GUIDE
Working with the UV view
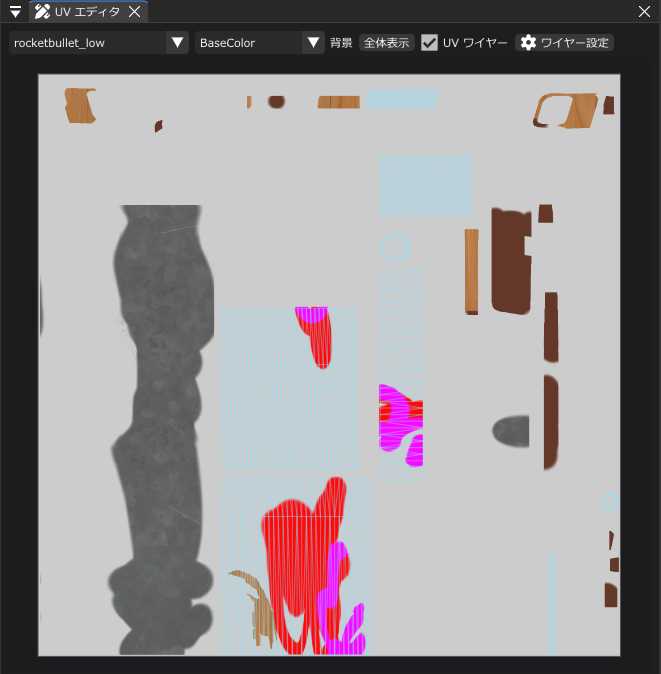
Triangles
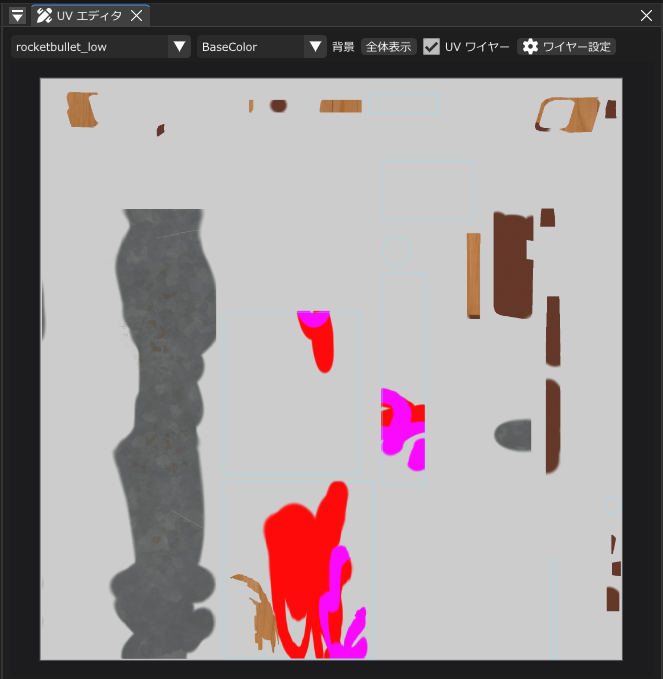
UV shells
Paint and navigate in the UV Editor
Select the Paint tool and a visible, unlocked paint layer, then drag on the UV Editor canvas to paint the corresponding model surface. Zoom with the mouse wheel, and pan with middle-button drag or Space + left drag. Rotate the view with Shift + Space + left or right drag. Shift + Space + left or right double-click resets only the angle, keeping the zoom and position. Fit resets rotation, position, and zoom. Dedicated cursors appear for panning and rotation. You can also edit path anchors here. The UV Editor does not unwrap or rearrange the UV layout itself.
Besides painting on Paint layers, the UV Editor supports material painting and painting masks on Fill and Adjustment layers. Check the target layer and mask-editing state first. UV strokes currently use fixed pressure and do not use the 3D view’s stroke stabilization. Paint in the 3D viewport when you need pressure variation or stabilization.
For text, shape, and image stamps in the viewport, use Ctrl + Alt + drag to adjust size and Shift + Space + drag to adjust angle. Both gestures work with either the left or right mouse button.
By default, Ctrl+left drag also zooms; moving right or up zooms in.
Edit path anchors in UV space
To create a path in the UV Editor, select a Path layer and the Path tool (P). Click to place anchors, hold and drag to create handles, and click the first anchor to close it.
While drafting a path, Finish commits it open, Close commits a closed path, and Cancel discards the draft.
Select a path layer, then move an anchor by left-dragging it in the UV Editor. By default, double-click a path segment away from existing anchors with the left mouse button to insert an anchor. This gesture follows the UV Editor binding in Preferences → Key Config. Path-editing gestures in the 3D viewport are different.
Check 3D painting at UV-island boundaries
The boundary-painting improvements in Ver.0.1.2 apply to painting in the 3D view.
- The ordinary brush can paint across UV-island boundaries on connected surfaces of the same part. See the brush guide
- For paths newly created in the 3D view, the issue with strokes and fills breaking or jumping to another position at UV-island boundaries has been fixed. Older paths saved with UV coordinates need to be recreated in the 3D view
Compare the UV Editor and 3D view to inspect results near a boundary. For older-version compatibility of scenes containing the new 3D paths, see the path guide.
Adjust the wireframe and background
Toggle lines with UV wire, and adjust their color, opacity, and width in Wire Settings. The default wireframe uses thin lines.
- Triangles — Shows internal edges as well. You can hide the diagonals of detected quads.
- UV Shells — Shows the boundaries of UV islands. Rectangular islands appear as outlines only.
- Fit — Returns a zoomed or panned view to a view of the entire canvas.
The background selector lets you switch between channels such as BaseColor and generated curvature, AO, normal, and position maps.